 |
|||||||||||
Preparation for fly casting |
PLEASE TAKE A LITTLE TIME TO READ THE LINK ON FLY LINES NEAR THE BOTTOM OF THE PAGE. |
|
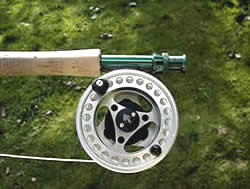
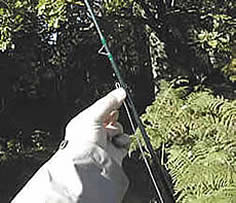
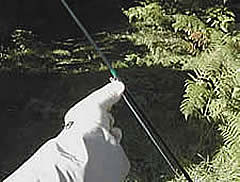
Do not try to reach the upper rod rings by stretching, simply lower the rod as you move along it’s length. You will find that by following these simple steps, there will be additional advantages: Being as you initially laid several yards of line on the ground, prior to threading your line up through the rod rings, you will now find it much easier to pull the rest of your fly line out through the rod tip. This will prevent your fly reel, (which is a very important piece of equipment when playing a fish) from getting scuffed, damaged, or full of sand or grit from the ground, due to the fact that the line has already been pulled from the reel prior to the threading up process, and will therefore not be rotating during this activity. Remember, your reel is not just a container for holding your line, it is also an important piece of kit when playing a fish and should be looked after and maintained at all times. |
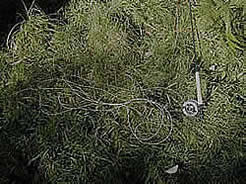
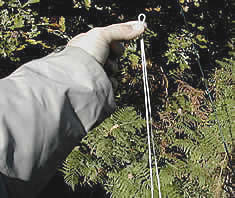
So why did we double up the fly lineprior to threading it through the rings: Well a common occurrance at this stage, whilst threading up your fly line, is that the spare line on the ground can either become snagged up in the grass etc, or you can accidentally stand on it whilst threading it through your rod rings, (which we all do from time to time).
This can then cause the fly line to be pulled from your hand and subsequently fall back through your rod rings therefore having to be re-threaded. This can once again waste valuable fishing time. The doubled over loop will prevent this from happening as the line is now much thicker, and will become trapped in your rod rings as it falls. You can now simply carry on threading up without starting from scratch. Finally, as your line is now temporarily thicker, it is also more manageable and more visible, especially early morning, or late evening when daylight is at a premium during the tackling up process. |
Once you have completed the threading up process you are now ready to tie on your leader and fly. The leader is the clear section (or invisible link) between your fly line and ultimately your fly, it is designed to make the connection to the business end much more difficult for the fish to see, therefore giving the angler a distinct advantage. The material you use for this will be a personal choice dependant on the application you require it for, e.g. Monofilament, fluorocarbon, copolymer etc. Unless your fly line has a welded loop at the tip, allowing for a loop to loop connection, the knot generally preferred for better presentation is either the nail knot, or its much cleaner counterpart, the Needle knot. "See the website link above for animated versions of these knots".
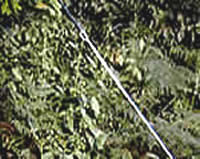
As you can see, the fly line on the left, (attached to leader via a needle knot) is much more visible than the leader material itself, which is just noticeable, attached to it on the right. It is essential to choose the correct diameter, length, and in some cases, colour of leader material for the particular situation in which you may find yourself. The fish's vision is a wonderful thing, but that's a story for another day. A tapered leader can also give you a distinct advantage as it will afford you a much better turnover and therefore presentation when casting your fly. |
Now before we add our leader and fly, let me explain briefly about fly lines etc. The fly rod we are about to cast with is often described as both a lever and a spring, and when preparing to practice any of the casts we are about to cover, we need to add weight to these attributes to give them substance, therefore giving your fly rod the potential to work more efficiently for the correct application. So to keep this basic explanation as simple as possible, work on the basis that you will need approximately 10 yards (just over 9 metres) of fly line outside your rod tip, (preferably on the water) to make your fly rod work reasonably well at short range from the outset, and although this is only a guide, it will at least give you a starting point. The reason for this, is that when a fly line is manufactured in the factory, it is designed to have enough weight concentrated within this front section to load or bend your fly rod reasonably efficiently during the casting process. This makes it much easier to control, and much more manageable. The fly line is basically the long flexible weight required to make your fly rod work more efficiently. For more (basic) information on fly lines, and how to choose the fly line rating that you will require to help load your rod correctly during casting, see the following attachment here on: When practicing your casting, use a piece of wool to simulate your fly, this is just as effective, and much safer. So at this point, you need to know when you have the correct amount of fly line pulled through your rod rings and out on the water in front of you, prior to executing your cast (i.e. the aforementioned 10 yards) . Many lines on the market today display a colour change at this optimum point which makes this process much easier. However, many fly lines these days will also have a longer front section (head length) than others may have, but will weigh similar to each other, which when first starting out in fly fishing can be very confusing, this is because they may be designed for different applications, e.g. casting heavy bugs or delivering delicate presentations etc. in which case the profiles of each line will differ and therefore may be shorter or longer than the 10 yards we have discussed. A lot of advanced fly casters these days will therefore prefer to weigh their lines to find the line that suits them best for the application it is required for. Anyway, let's stick to the job in hand, and if your line does not display a colour change, or if you do not want to weigh all of your lines, there is a simple method to get you started, i.e., the fly line can be marked prior to visiting the water, which can be done in the following way :-
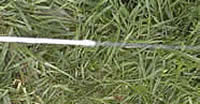
Now every time you visit the water, all you need to do is pull the line from your reel, until you reach the point where you have marked the fly line with the felt tip marker (use a permanent marker or it may rub off). You will now know exactly when you have the correct amount of line pulled from your fly reel to make your rod work more efficiently, and because you marked the line near the reel, (as indicated above) it will always be at hand when you have threaded the fly line through your rod rings and removed the required amount of fly line from your reel. There is no point in struggling to see a mark that has been applied near the tip of the rod as some people do. However, as discussed above, many of today's modern weight forward fly lines now have a colour change incorporated in them that tells you exactly when you have the correct amount of fly line (head length) outside the rod tip to give you the required casting weight. If you are using the above method to mark your fly line, just be aware that the head length on weight forward lines, which consists of a front taper, belly, and back taper, will generally work better for you if the whole head is outside of the rod tip, or if the back taper is slightly inside, (especially for roll casts) and bear in mind that head lengths may vary, so this should also be taken into consideration before marking your line. All you need to do now is attach the required leader (preferably tapered) and fly and approach the water. Hold your fly in the hand you are not holding the rod with, hook pointing away from you (for safety) then flick the loose line and fly onto the water in front of you. At this point you need to feed out the line you have pulled from your reel and through your rod rings, onto the water in front of you, to enable you to make an efficient cast. To do this, use the grip that the water has on your fly line, leader and fly, and move the rod tip from side to side, as if you were slicing sideways with a sword, or cutting the heads off the daisies (keep the wrist relatively stiff, as this will help you to use the rod to better effect). At the same time, feed the fly line through the hand you are not holding the rod with, (your line hand). This can be done by making a tight downward pointing fist with your line hand, then just slacken it off slightly, to use as a guide to feed the line through. When all the fly line you have pulled from your reel has been fed out onto the water in front of you, and the mark on the fly line is at hand, (near your reel) you can now organise your line with a roll cast prior to using any other cast. |
home | about me | casting tuition | faults & cures | courses | angling holidays | accommodation | Links | Contact Us | Site Map
